Our Clients enjoy “Sound Sleep” because they have Trust in our 24×7 Tech Support!!!
 #HostechSupport #HostechSupportindia #24×7 Remote Technical Support #Server Management #PerServer Management #Perticket plan #Startup plan #ServerAdministration #Cloud Management #Dedicated Support plan #Semidedicated Support plan #VPS Management.
“Ready for the Dedicated Love & Support 24×7”

#HostechSupport #HostechSupportindia #24×7 Remote Technical Support #Server Management #PerServer Management #Perticket plan #Startup plan #ServerAdministration #Cloud Management #DedicatedSupport plan #Semidedicated Support plan #VPS Management.
For further details, contact us on our 24×7 Skype id: hostechsupportindia or email us on sales@hostechsupport.com.
For further details, contact us on our 24×7 Skype id: hostechsupportindia or email us on sales@hostechsupport.com.
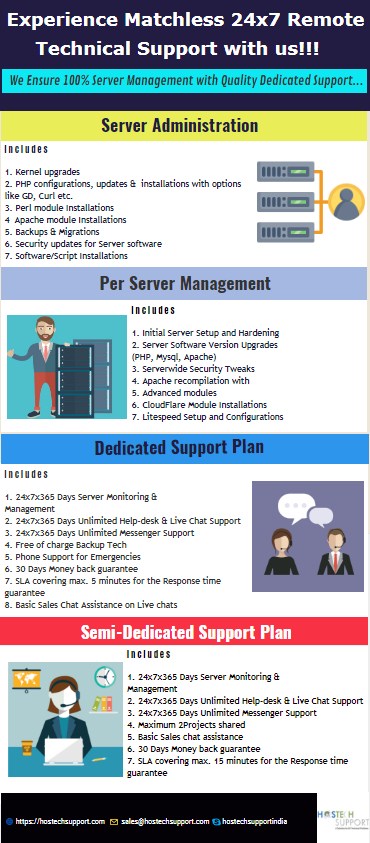
Customize your Dedicated Support with us!!
 #Dedicated Support plan #HostechSupport #HostechSupportindia #24×7 Remote Technical Support #Server Management #Per Server Management #Per ticket plan #Startup plan #Server Administration #Server Monitoring #Cloud Management #Trusted certified admins
Thinking about a Trustworthy Tech Support partner?
HostechSupport serves you 24×7 Superior Technical Support at Best Prices with Addon Benefits!!!
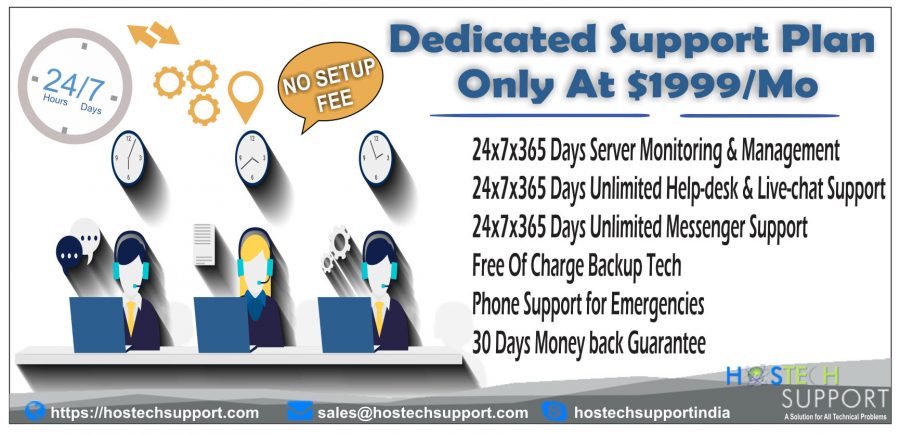
Dedicated SupportPlan #HostechSupport #HostechSupportindia #24×7Remote Technical Support #Server Management #Server Monitoring #24×7 Unlimited help-desk #24×7 Live chat support #Free of charge backup techs #phone support emergencies #30days money back guarantee.
For further details, contact us on our 24×7 Skype id: hostechsupportindia or email us on sales@hostechsupport.com.
“Claim your 7 DAYS FREE Trial Now!!”

HostechSupport HostechSupportindia 24×7 Remote Technical Support 7 Days Free technical support Server Management Per Server Management Per ticket plan Startup plan Server Administration CloudManagement Dedicated Support plan Semi-dedicated Support plan VPS Management.
For further details, contact us on our 24×7 Skype id: hostechsupportindia or email us on sales@hostechsupport.com.
Build your Brand with “Dynamic Designs”
 Feel free to ping us @ our 24×7 Live chat assistance
We Announce a Never-before Festive Offer on our – ‘Technical Support Plans’

Your 24/7 Technical support provider, HostechSupport feels elated to celebrate the Festival of lights, Diwali…with you all

How to install LAMP on Ubuntu16.04
- Update your system (Login with SSH on your server)
Before we start, let’s make sure your system is up-to-date by running the following command:
#apt-get update && apt-get upgrade
Always keep your system updated. You can also set up automatic updates.
- Installing Apache
We will start with installing the Apache web server. Apache is considered as the most widely used web server software. It is fast, secure, reliable and can be easily customized depending on your needs.
To install Apache on your server, run the following command:
#apt-get install apache2
After the installation is complete, you should enable Apache to start automatically upon system boot. You can do that with the following command:
#systemctl enable apache2
To verify that Apache is running, open your web browser and enter your server IP address, (e.g. http://111.222.333.444). If Apache is successfully installed you should see a message saying “It works!”.
- Installing MySQL
Next, we will install MySQL on your server. MySQL is one of the most popular database management systems.
To install MySQL on your system, type the following command and enter Y to continue:
#apt-get install mysql-server
During the installation, you will be asked to enter a password for the MySQL root user. Make sure you enter a strong password.
After the installation is complete, in order to improve the security of your MySQL server, we recommend doing the MySQL secure installation by typing the following command:
#mysql_secure_installation
First, you will be asked about setting up the validate password plugin.
Would you like to setup VALIDATE PASSWORD plugin?(Press y|Y for Yes, any other key for No) :
This plugin checks the strength of a password and allows the users to set only passwords which are secure enough.
Whether to enable this or not is entirely up to you, but it’s always recommended to use strong passwords.
If you choose ‘yes’, you will be asked to choose the level of the password validation policy:
There are three levels of password validation policy:
LOW Length >= 8
MEDIUM Length >= 8, numeric, mixed case, and special characters
STRONG Length >= 8, numeric, mixed case, special characters and dictionary file
Please enter 0 = LOW, 1 = MEDIUM and 2 = STRONG:
Next, you will be asked to change the root password, but since we already created it during the MySQL installation, we can skip this step by pressing Enter.
After this, you will get asked a couple of more questions and it is recommended that you answer ‘yes’ to all of them:
Remove anonymous users? (Press y|Y for Yes, any other key for No) :
Disallow root login remotely? (Press y|Y for Yes, any other key for No) :
Remove test database and access to it? (Press y|Y for Yes, any other key for No) :
Reload privilege tables now? (Press y|Y for Yes, any other key for No) :
Again, we can enable MySQL to start on boot with the following command:
#systemctl enable mysql
With this, your MySQL installation is now complete.
- Installing PHP
The last step in this tutorial is to install PHP. PHP is a programming language mostly used for developing dynamic websites.
We will also include some additional modules, in order to help PHP to connect to our Apache and MySQL.
Now, if you navigate to this page: http://your_server_ip_address/info.php in your web browser, you will see the following page showing your current PHP configuration:
